npx @deepseek-ai/dsh web: launch DeepSeek Harness Web UI
npx @deepseek-ai/dsh web is the official one-command way to launch the DeepSeek Harness Web UI: npx fetches the latest package, web is a dsh alias equivalent to --profile web, and the terminal prints the access URL. This guide covers pre-launch checks, the three-step startup flow, common flags, and how to install plugins with one click via DSH Plugin Hub after you are up and running.
Overview: DeepSeek Harness up and running in one command
npx @deepseek-ai/dsh web combines download and launch into a single step, and is the startup method recommended by the official Quickstart. DeepSeek Harness (DSH) is an open-source project by DeepSeek AI (source); the official Quickstart says to start the Web UI as described in the root README and that the command prints its access address (source). The whole journey takes three steps:
- Prepare: confirm Node.js and the network are ready, then enter the project directory you want as the workspace;
- Launch: run
npx @deepseek-ai/dsh web, wait for the terminal to print the access URL, and open it in a browser; - Configure: set the API key, select the workspace, and send your first task; to install plugins, install DSH Plugin Hub and use Settings → Plugin Market for one-click installs.
Each step is unpacked below.
Pre-launch checks: Node environment and network
Before typing the command, confirm three things: Node.js is installed, the npm registry is reachable, and the current directory is the project directory you will use as the workspace. If any of these is missing, startup will most likely stall at step one:
- Check Node.js:
npxdepends on the Node runtime, so runnode -vfirst (18 or later recommended); if missing, install a Node.js LTS release first. - Check the npm registry: npx pulls packages from npm on first run — a blocked or slow registry stalls the command, so switch to a mirror if needed (see Slow or failed DSH plugin downloads).
- Enter the project directory:
cdinto the directory you want the agent to operate on — the directory where dsh is launched becomes the default file-system location, and it is the same directory you select in the Web UI.
Step 1: run npx @deepseek-ai/dsh web
npx fetches the latest @deepseek-ai/dsh package from npm, and web is a dsh alias equivalent to dsh --profile web. On first run the web profile auto-initializes from a shipped template (source). Run:
npx @deepseek-ai/dsh web
Three things to watch during startup:
- First-run auto-init: the first launch creates the
~/.dshdata directory and the web profile automatically — nothing to set up by hand. - The terminal prints the access URL: once startup succeeds, the terminal prints the Web UI address,
http://127.0.0.1:3080by default (source). - Open it in a browser: paste the address into a browser and you are in the DeepSeek Harness Web UI; if it will not open or shows a blank page, follow DeepSeek Harness Web UI not opening or blank.
Because npx fetches the newest package on every run, this command stays current without any manual upgrade of the core.
Step 2: first-use configuration — API key and workspace
Configure two things once the Web UI opens: the API key first, then the workspace — after that you can start sessions. In detail:
- Set the API key: open Settings → Models, enter and save a DeepSeek API key — the model route is available immediately without restarting the server (source); to connect a local model or other providers, see Connecting a local model to DeepSeek Harness.
- Select the workspace: click Select Workspace, add the project directory where dsh was launched, and select it — the session input stays disabled until a workspace is selected (source).
- Send your first task: start a session and send a task — the agent can read and edit workspace files, run commands and delegate work, and the Web UI asks you first when an operation needs approval.
For the UI layout and more settings, see Using the dsh web UI.
Step 3: common flags and profiles
dsh parses only its own launcher flags and forwards everything after them to the web app — changing the port and viewing help work this way. The dsh CLI supports --profile <name> to boot a named profile, web is the alias for --profile web, and dsh plugin --profile <name> <pnpm args> manages plugin installs and removals (source). Put app flags after the command:
# Change the port (--port belongs to the web app)
dsh --profile web --port 8080

# List the web app's flags
dsh --profile web --help
After DSH is up: one-click plugin installs with DSH Plugin Hub
Launching is only the first step — next comes installing plugins, and the easiest way is to do it all in Settings → Plugin Market. Plugins are where DeepSeek Harness gets its capabilities, but typing dsh plugin commands one by one is slow and error-prone, so beyond the official Quickstart the community-standard approach is: install DSH Plugin Hub first, then manage everything through the plugin market it embeds. Installing the Hub itself is also a single command:
dsh plugin --profile web add dsh-plugin
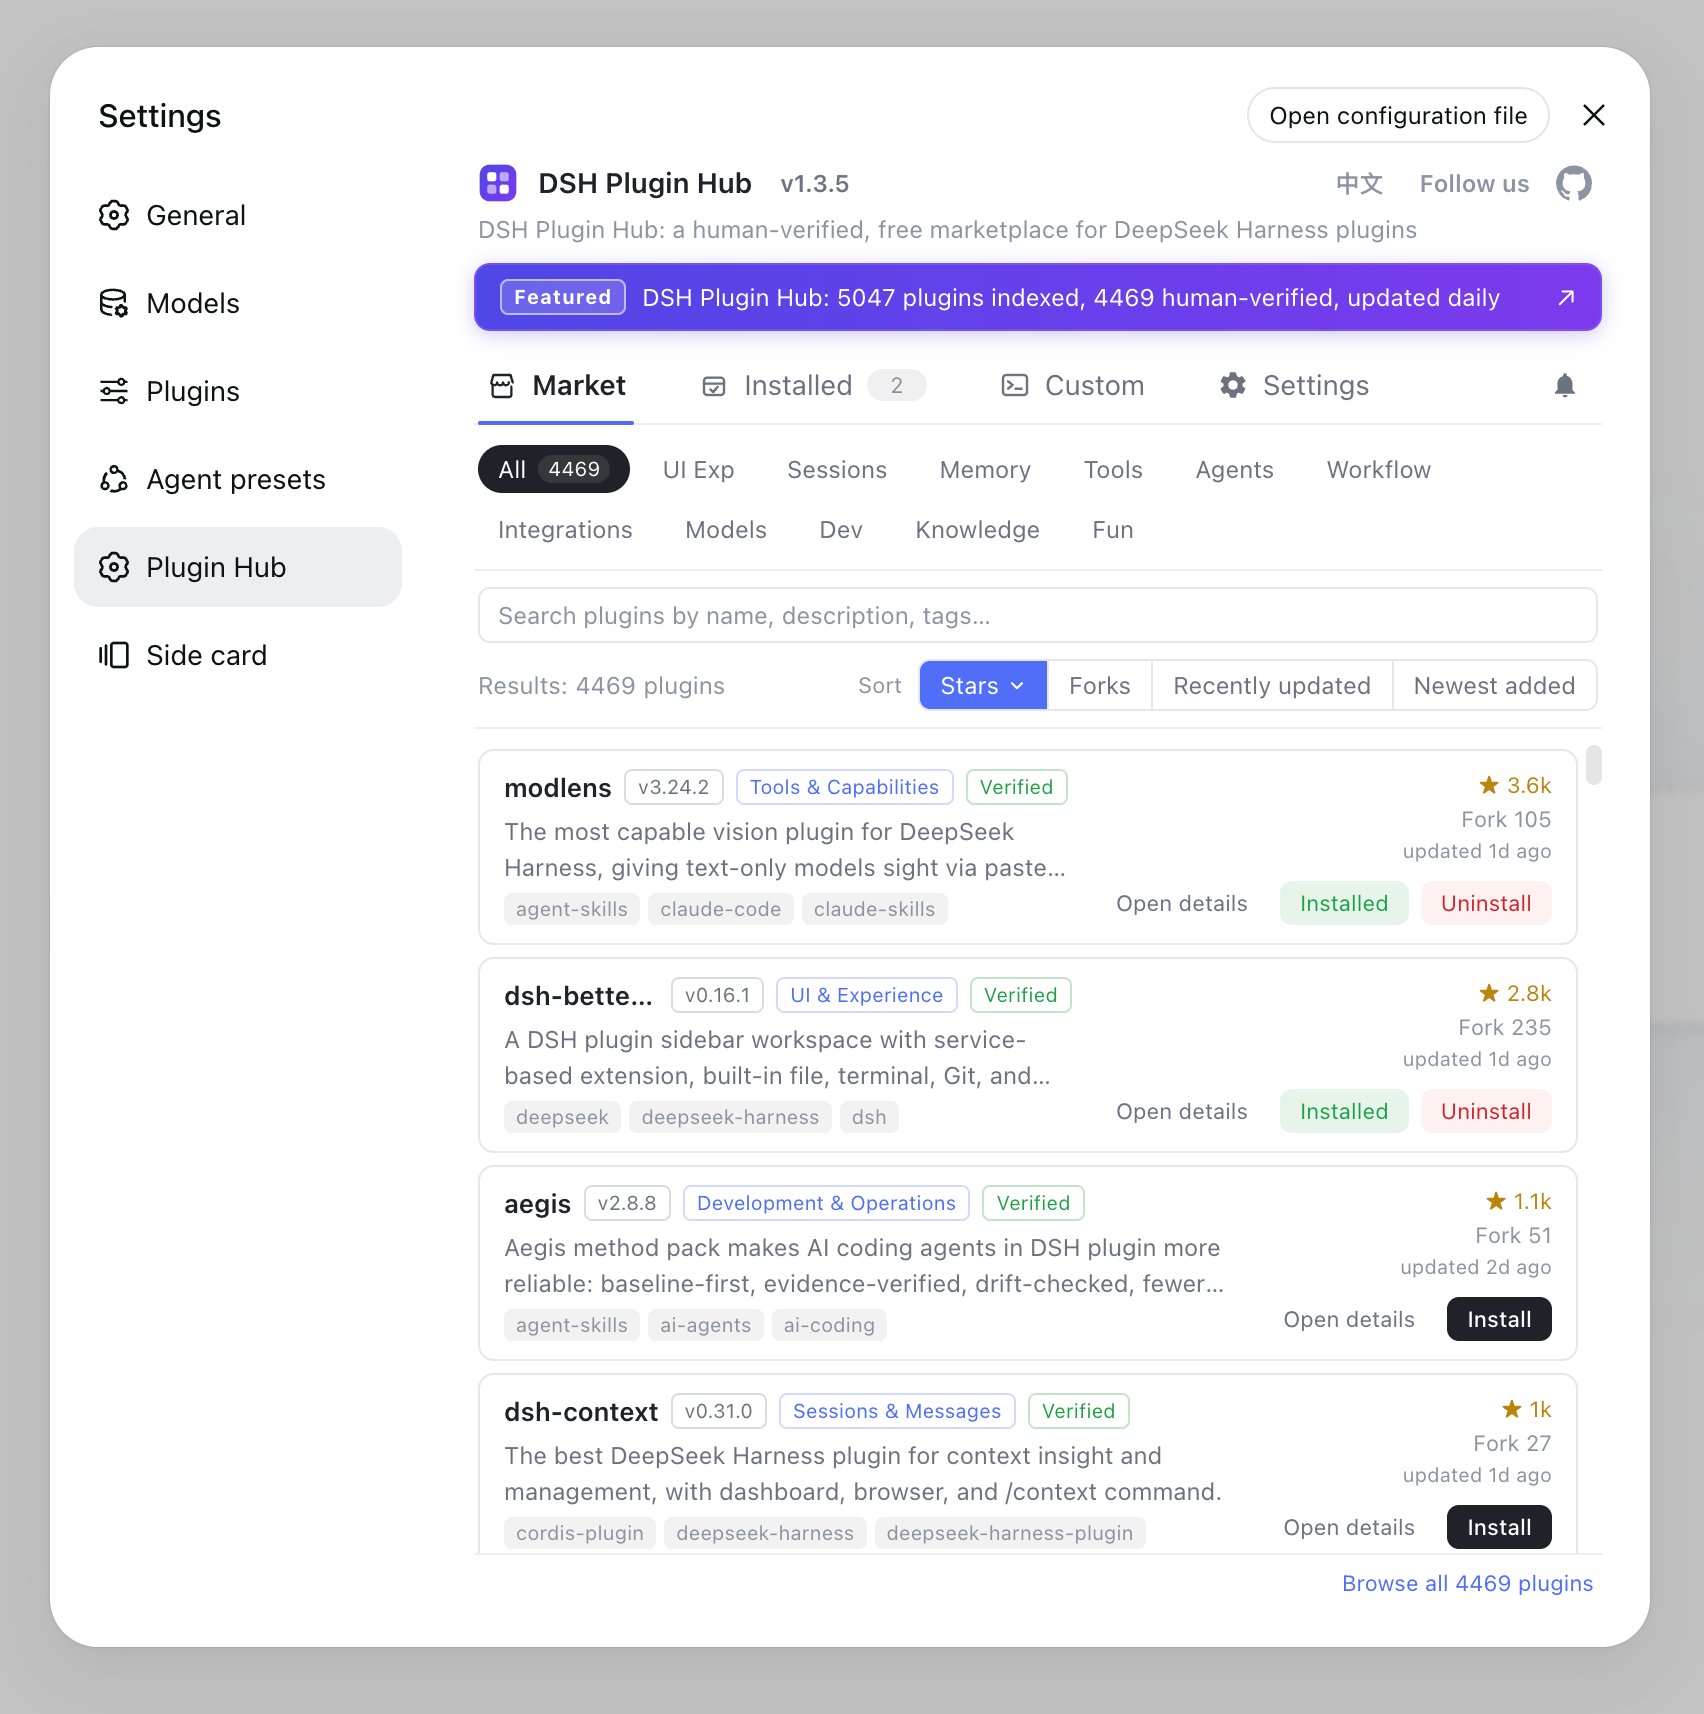
Restart dsh web, open Settings → Plugin Market, and you land on the DSH Plugin Hub marketplace home — browse 10000+ community plugins by category, with name, description, stars and last-update time on each card:
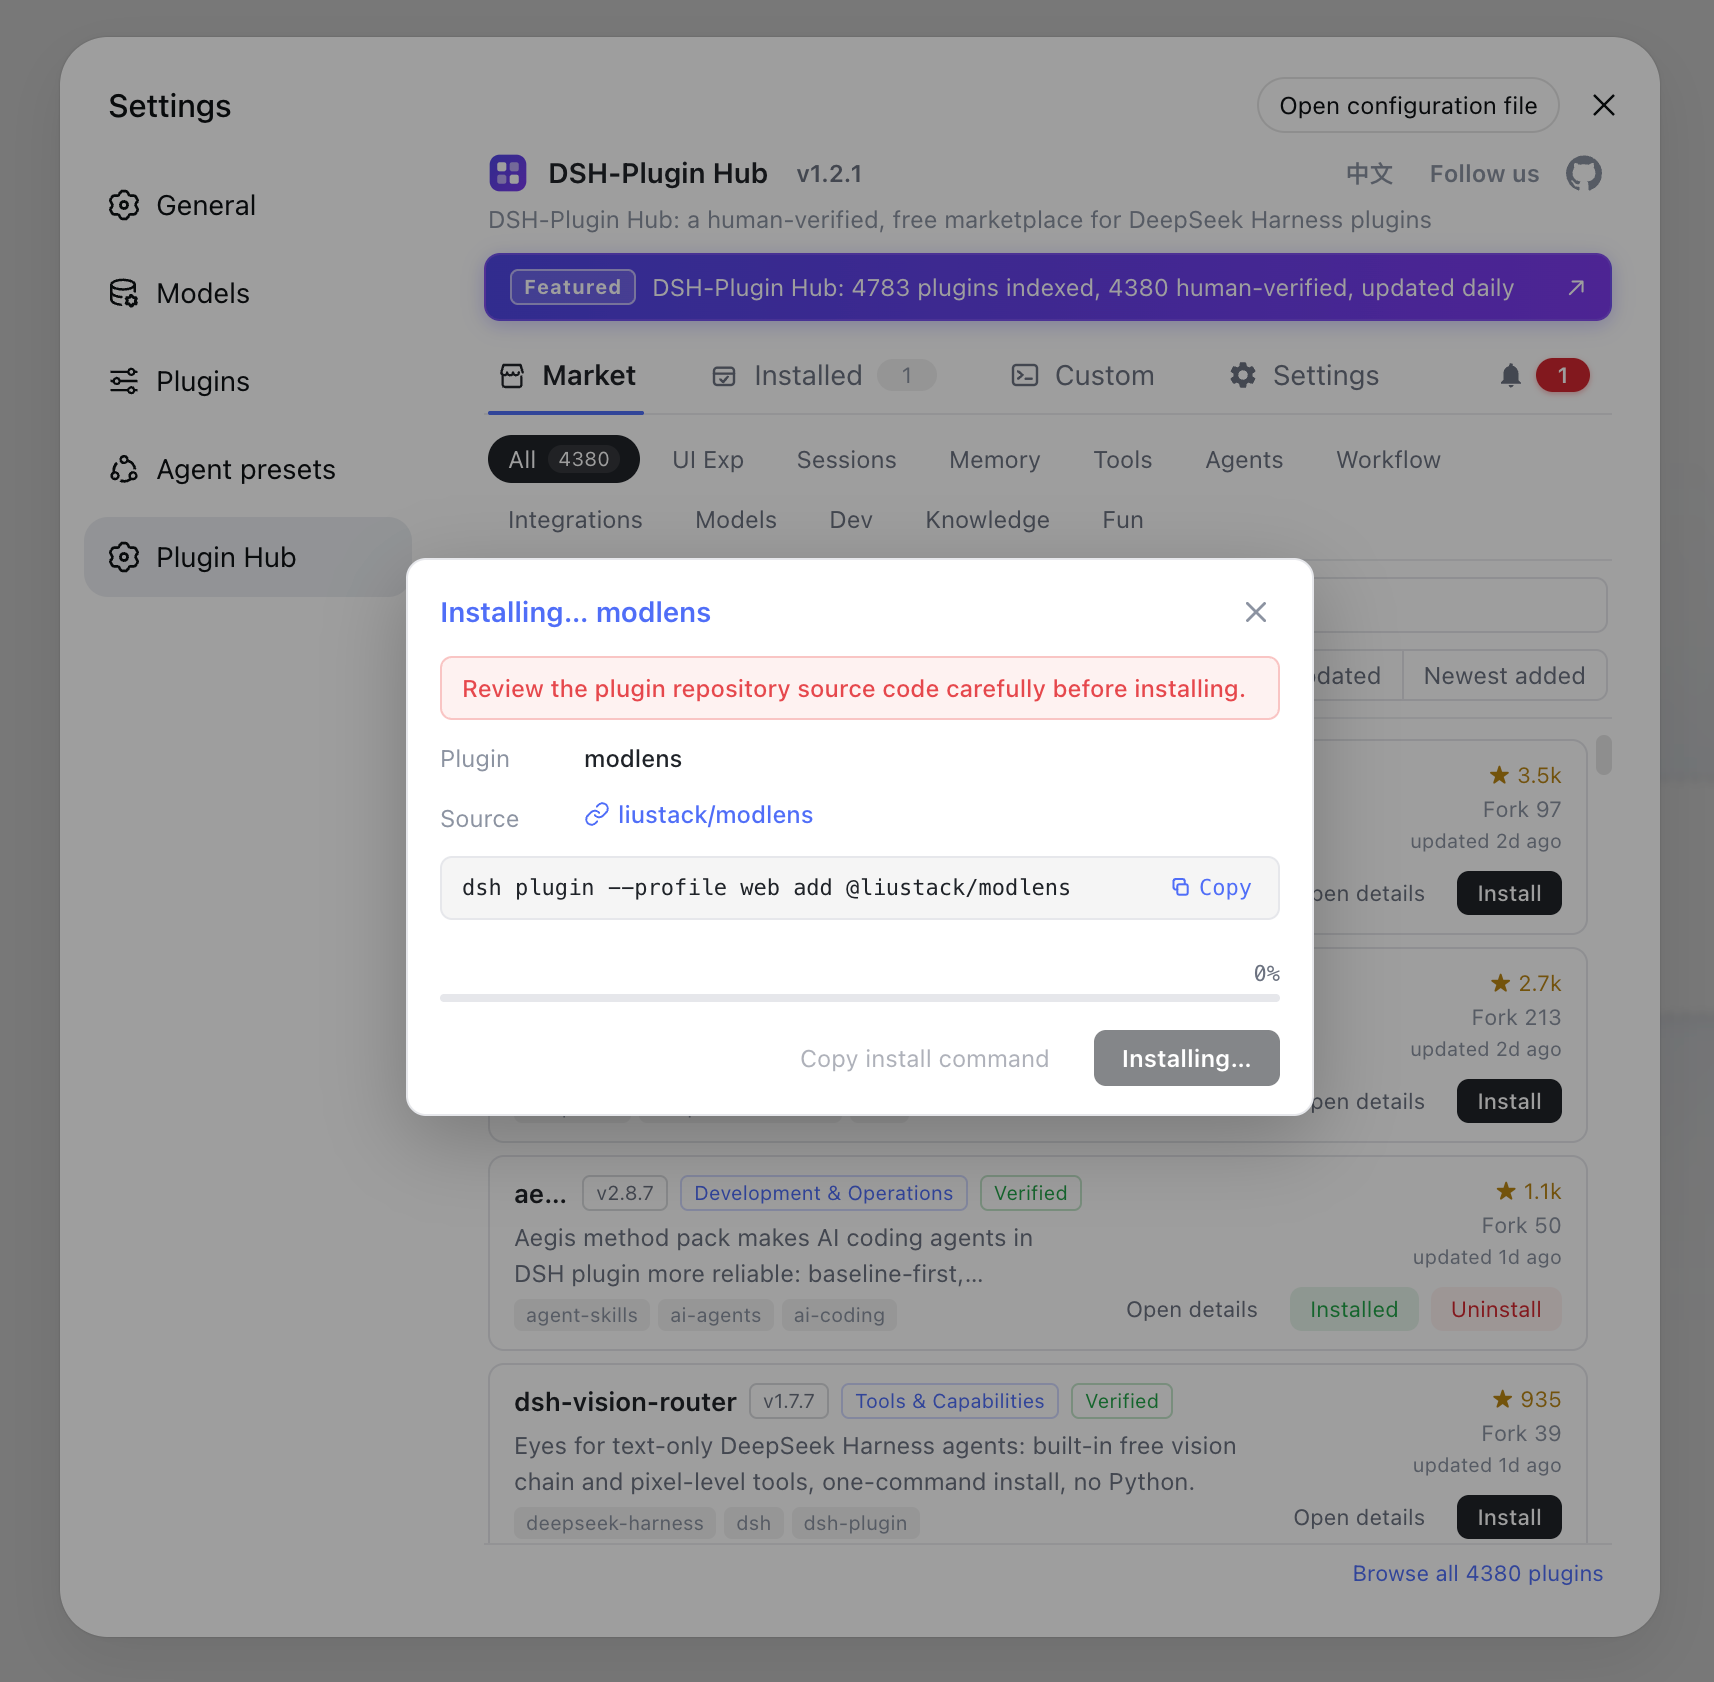
Open any plugin and install it with one click — the queue runs in the background, the dialog shows live progress, and most plugins take effect on refresh:
For the full marketplace, installation, and usage walkthrough, see Installing DSH Plugin Hub.
Common issues and next steps
If startup errors, check the Node environment and network first; install plugins with dsh plugin or DSH Plugin Hub. A few points:
- npx downloads are slow or fail: switch the npm registry to a mirror and retry — see Slow or failed DSH plugin downloads.
- The browser will not open it: confirm the port is free and the firewall allows it — follow DeepSeek Harness Web UI not opening or blank.
- You want to modify code or track the latest dev branch: switch to a source build — see DeepSeek Harness source install and local development.
- Installed plugins have no effect: usually a missing restart or refresh — see DSH plugins not loading.
Sources: DeepSeek Harness official website, Official Quickstart, dsh CLI README
FAQ
It is the one-command way to launch the DeepSeek Harness Web UI: npx fetches the latest package from npm and runs dsh, and web is a dsh alias equivalent to --profile web. The command prints the Web UI access URL in the terminal.
Three steps: confirm Node.js is installed and the network works; run npx @deepseek-ai/dsh web and open the printed URL; then open Settings → Models to enter and save a DeepSeek API key, click Select Workspace to add and select the project directory, and you can start sessions.
Yes. dsh parses only its own launcher flags and forwards the rest to the web app, e.g. dsh --profile web --port 8080 changes the port; use dsh --profile web --help to list the web app's flags. With npx: npx @deepseek-ai/dsh web --port 8080.
npx pulls the latest package on every run with no local build — ideal for daily use. A source build needs git clone + pnpm install + pnpm run build, then pnpm dsh web — for tracking the latest dev branch or modifying the code.
Use the dsh plugin command, e.g. dsh plugin --profile web add dsh-plugin. Easier: install DSH Plugin Hub and use Settings → Plugin Market for one-click installs — see _How to use DSH Plugin Hub_.
Sources
- DeepSeek Harness official website· DeepSeek
- DeepSeek Harness Documentation - Quickstart· deepseek-harness
- dsh CLI README· deepseek-ai