npm install -g @deepseek-ai/dsh: global install vs npx one-liner
npm install -g @deepseek-ai/dsh is the official way to get dsh as a global command: once installed you can run dsh web from any directory, upgrade with npm update -g, and remove it with npm uninstall -g - one command for each. It is one of three ways to get DeepSeek Harness, next to npx one-liners and source builds; this guide walks through install, comparison, update/uninstall, and adding plugins, with copy-paste commands throughout.
Overview: three install methods, global is the daily driver
DeepSeek Harness (DSH) can be installed globally, run via npx, or built from source - the global install is the most stable path for daily use (source). Keep these conclusions in mind, then follow the commands below:
- Global install:
npm install -g @deepseek-ai/dsh- puts dsh on your PATH, best for daily use; - npx one-liner:
npx @deepseek-ai/dsh web- fetches the latest release every run, best for a quick try; - Source build:
git clone+pnpm install+pnpm run build- for customizing code or tracking the dev version (see Build DeepSeek Harness from source); - After the core is ready: add plugins via DSH Plugin Hub.
Each step below comes with copy-paste commands.
Step 1: install globally with npm install -g @deepseek-ai/dsh
A global install puts dsh into the system-wide location and adds it to PATH, so you can call it from any directory. Open a terminal and run:
npm install -g @deepseek-ai/dsh
Then verify with three commands:
# 1. Print the version - output means it is installed
dsh --version

# 2. Show where the command lives
which dsh

# 3. Start the Web UI to confirm it works
dsh web
When to pick global: if you plan to use DeepSeek Harness long-term - starting the Web UI daily, managing plugins with dsh plugin, switching between project directories - global install saves you from typing a long npx prefix every time.
Step 2: npx vs global vs source - when to use which
No method is better than the others - it depends on the scenario: global for daily work, npx for a quick try, source for hacking. Compare across three axes:
| Method | Command | Notes | Best for |
|---|---|---|---|
| Global | npm install -g @deepseek-ai/dsh | Install once, update manually | Daily users |
| npx | npx @deepseek-ai/dsh web | Latest release every run, no footprint | Trying it out, testing versions |
| Source | git clone + pnpm install + pnpm run build | Customize code, track dev builds | Developers, plugin authors |
Decide in three steps:
- Not sure yet: run
npx @deepseek-ai/dsh webonce - the cheapest way to evaluate; - Committed long-term: install globally, every future command gets shorter;
- Need to change code or track the dev version: build from source (see Build DeepSeek Harness from source).
The full npx startup flow is covered in Start the DeepSeek Harness Web UI with npx @deepseek-ai/dsh web - not repeated here.
Step 3: update and uninstall a global install
Updating and uninstalling a global dsh install is one command each - no installer to download. Check the newest version first, then update:
# 1. Check the latest dsh version on npm
npm view @deepseek-ai/dsh version

# 2. Update the global dsh to the latest
npm update -g @deepseek-ai/dsh

# 3. Verify the new version
dsh --version
Done with dsh? Uninstalling is equally short:
npm uninstall -g @deepseek-ai/dsh
Three things to remember:
- Uninstall keeps your data:
npm uninstall -gonly removes the binary; sessions, config, and plugins under~/.dshstay untouched. For a full data cleanup see Reinstall DeepSeek Harness without losing data; - npx never needs updating: every run already fetches the latest release;
- Restart after updating: if the Web UI is running, restart
dsh webfor the new version to take effect.
After dsh is installed: add plugins with DSH Plugin Hub
The core install is only step one - DeepSeek Harness gets its power from plugins, and the easiest way is one-click installs in DSH Plugin Hub under Settings > Plugin Market. Install the Hub itself first:
dsh plugin --profile web add dsh-plugin
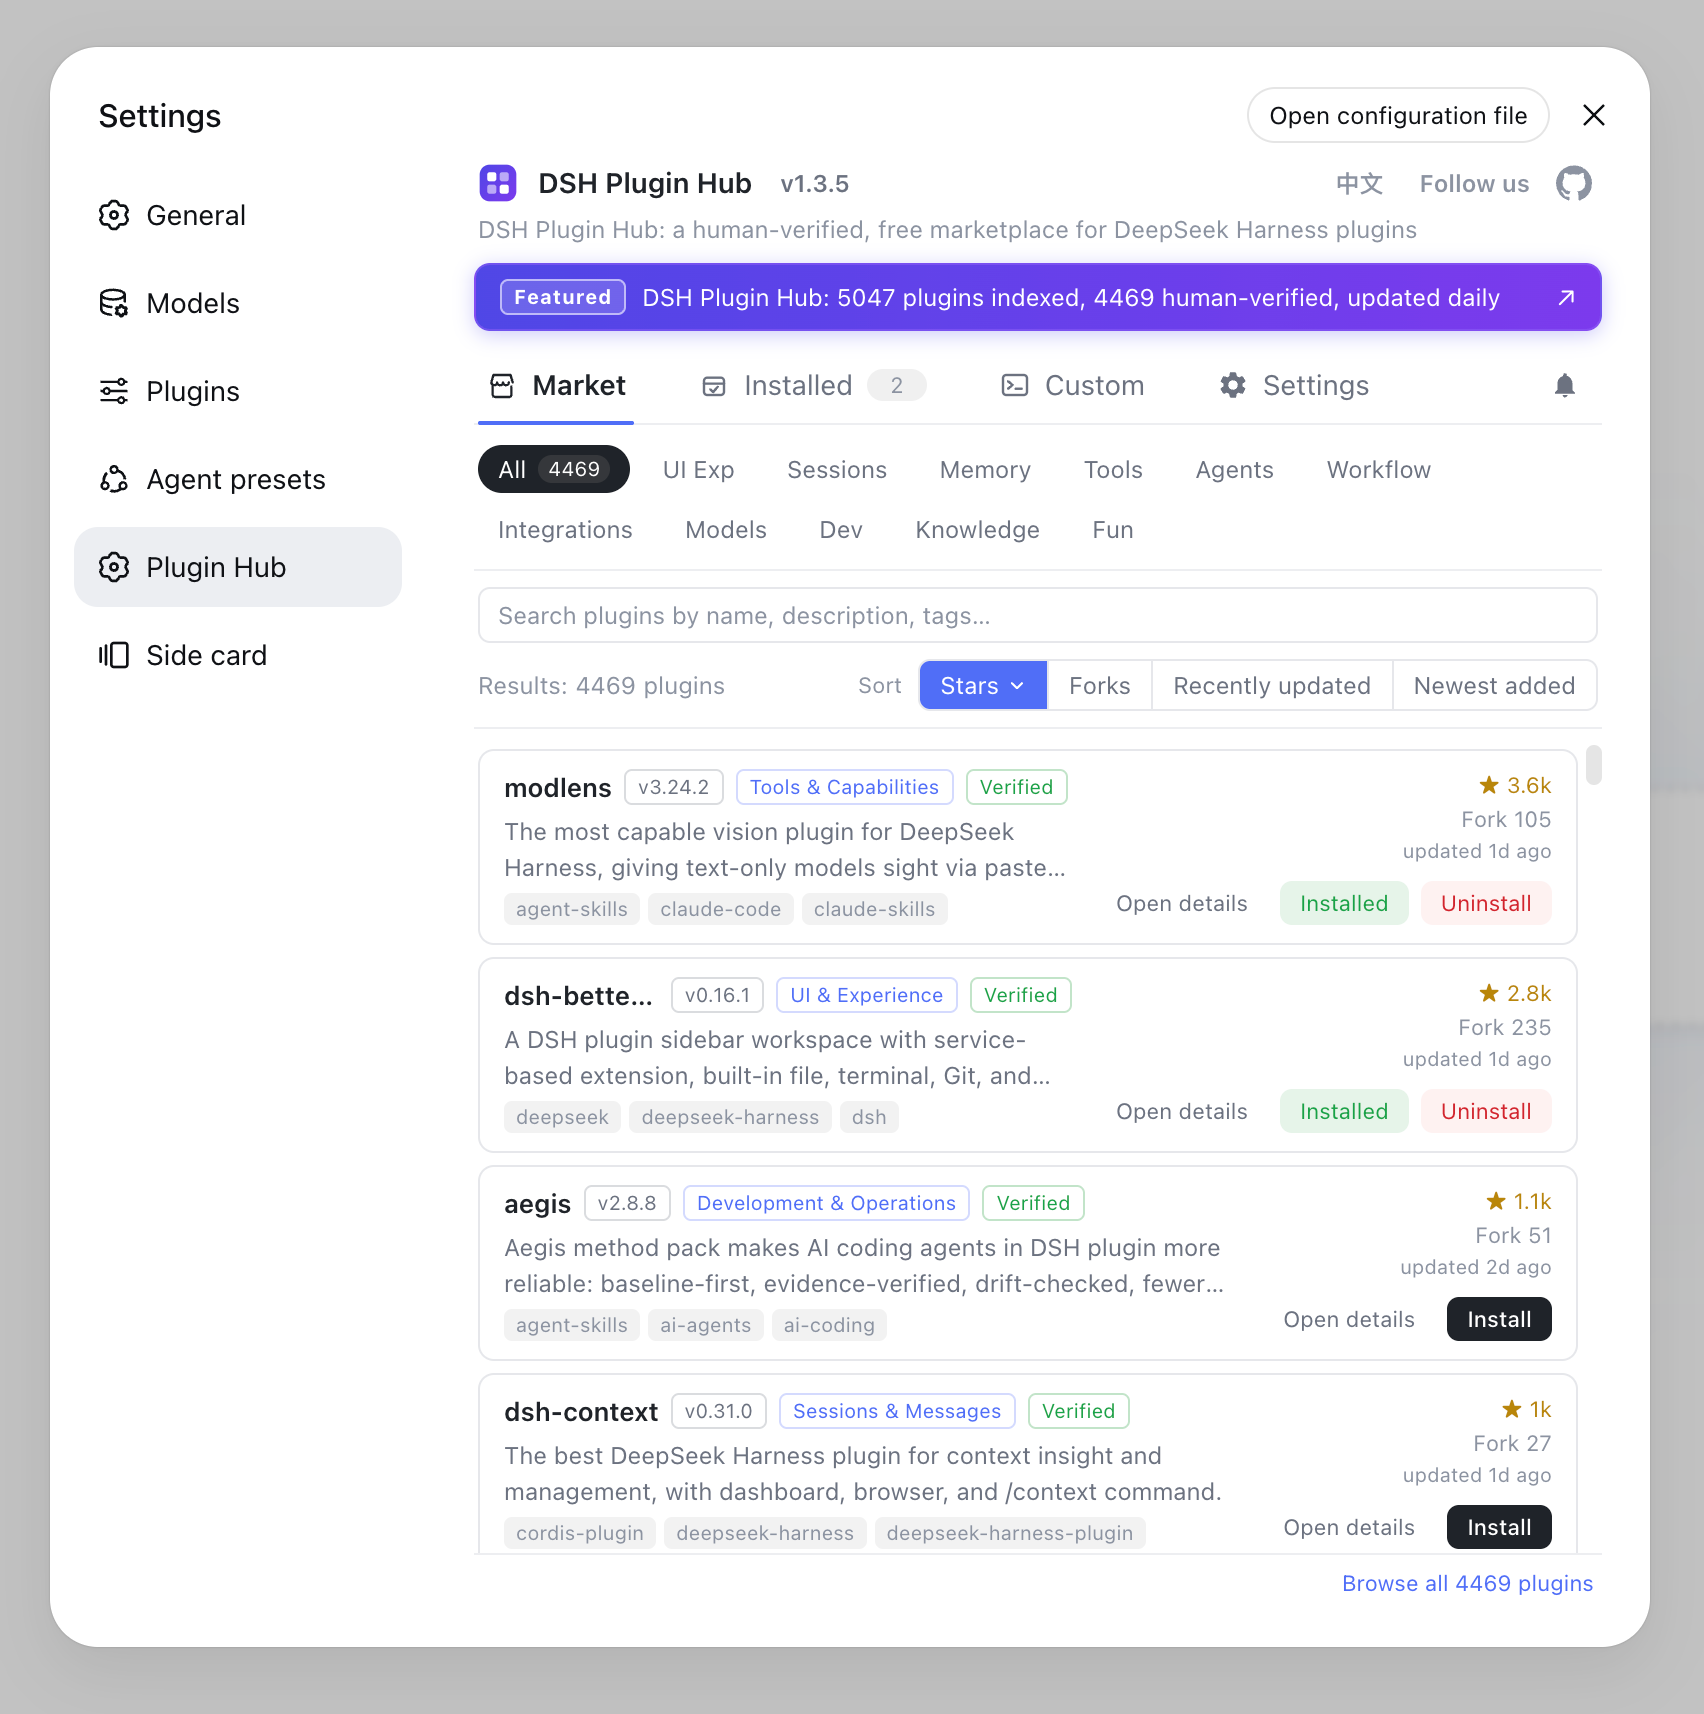
Restart dsh web, open Settings > Plugin Market, and browse 10000+ community plugins by category. Click a card to install with live progress - no need to memorize package names for dsh plugin add. For the three CLI sources behind those buttons, see Where to install DSH plugins.
Notes
Global install fits daily use, but two details are worth remembering. Quick reminders:
- Node version: a global install depends on Node.js - check
node -vfirst (18 or later recommended); - Slow npm registry: if install or update stalls, switch to a faster npm mirror and retry (see DSH plugin download failures and slow downloads);
- Windows: if you see
'dsh' is not recognized as an internal or external commandafter a global install, the npm global bin directory is not on PATH - see Fix 'dsh' is not recognized.
Sources: DeepSeek Harness official site, Official Quickstart, dsh CLI README
FAQ
It installs the dsh command-line tool globally so you can run dsh web from any directory. Choose this if you use DeepSeek Harness every day: one command to install, one to update, one to uninstall.
Global install puts dsh on your PATH so dsh web and dsh plugin work everywhere. npx @deepseek-ai/dsh web pulls the latest release on every run and leaves nothing behind. Use global for daily work, npx to try it out.
Run npm update -g @deepseek-ai/dsh. Check the newest version first with npm view @deepseek-ai/dsh version. With npx there is nothing to update - every run already fetches the latest release.
Run npm uninstall -g @deepseek-ai/dsh to remove the global command. Your data under ~/.dsh (sessions, config, plugins) is kept. Reinstall anytime with npm install -g @deepseek-ai/dsh.
No. A global install lives in the system-wide node_modules and never conflicts with project-level dependencies. dsh data is stored in ~/.dsh, separate from any project, so switching projects is safe.
Sources
- DeepSeek Harness official site· DeepSeek
- DeepSeek Harness docs - Quickstart· deepseek-harness
- dsh CLI README· deepseek-ai