Write your first DSH plugin: minimal structure, local debug
Your first DSH plugin does not need a full project: one TypeScript module exporting an apply function is a complete plugin. What actually needs planning is the debugging loop, since you must first get the host to load it and then prove it took effect. This article walks the four steps: minimal structure, configuration, installing into a profile, and troubleshooting.
What a minimal DSH plugin looks like: one module, one apply function
In DeepSeek Harness a plugin is a TypeScript module that exports an apply function; the framework calls apply on load and passes a ctx through which you register capability (source).
- Create a directory. Pick an empty directory for experiments, for example
scratch-plugin/srcat the repository root. Expected: somewhere to keep plugin files without disturbing the main project layout. - Write the minimal plugin file. Export
nameto identify the plugin and exportapply(ctx). Expected: that is already a complete plugin, and bothnameandapplyare required. - Declare inject for services you need. To use the tool service, write
export const inject = ['tools']. Expected: the framework waits until that service is ready before callingapply, and unloads the plugin when it disappears. - Pick a plugin shape. The function form is most common, the class form serves other plugins, and an object exporting
name,inject, andapplyworks too. Expected: the three are equivalent, so get the loop working with the function form first.
On cleanup: anything registered through ctx, such as event listeners, tools, and timers, is revoked automatically when the plugin unloads, so no manual removeListener is needed. Only resources the framework cannot track, such as a network connection, need a ctx.effect() disposer.
import type { Context } from '@deepseek-ai/cordis'

export const name = 'hello-plugin'

export function apply(ctx: Context) {
  console.log('[hello-plugin] plugin loaded!')
}
Making a DSH plugin accept configuration: Config and the second argument
To accept user configuration, a plugin exports a Config describing the shape and receives the configuration object as the second argument of apply (source).
- Define the configuration shape. Declare fields with
Schema.object({...}). Expected: the framework knows field types and defaults, so bad configuration is rejected by validation. - Receive it in apply. Write
export function apply(ctx: Context, config: Config). Expected: the body can useconfig.somethingdirectly, with no parsing of your own. - Ship sensible defaults. Make the plugin work with no configuration at all. Expected: during early local debugging you can load it first and configure later.
- Remember where configuration lives. Values end up in the profile's configuration layers, not in plugin code. Expected: the same plugin can behave differently per profile, which is also the usual reason local and deployed behaviour differ.
Where those files live and how the layers stack is covered in where DSH config lives.
Installing a DSH plugin into a profile for debugging: two routes
A local plugin gets into the runtime two ways: a patch overlay for a single file, or dsh plugin for a packaged directory (source).
- Write a patch overlay. Create a YAML file and use an
insertlist whose entry hasidandname. Expected:namepoints at your plugin file and must be an absolute path. - Start with the overlay. Pass that YAML to dsh with
--patch. Expected: the log line from your plugin appears on startup, proving it loaded. - Switch to installing the package into a profile. Turn the plugin into a local package directory with a
package.json, then rundsh plugin --profile web add <local path>. Expected: the command forwards its arguments to pnpm, which installs the local directory into that profile's node_modules. - Reload and verify after each change. Restart the host and watch the log again. Expected: your edit takes effect; if it does not, confirm the host is loading the file you edited.
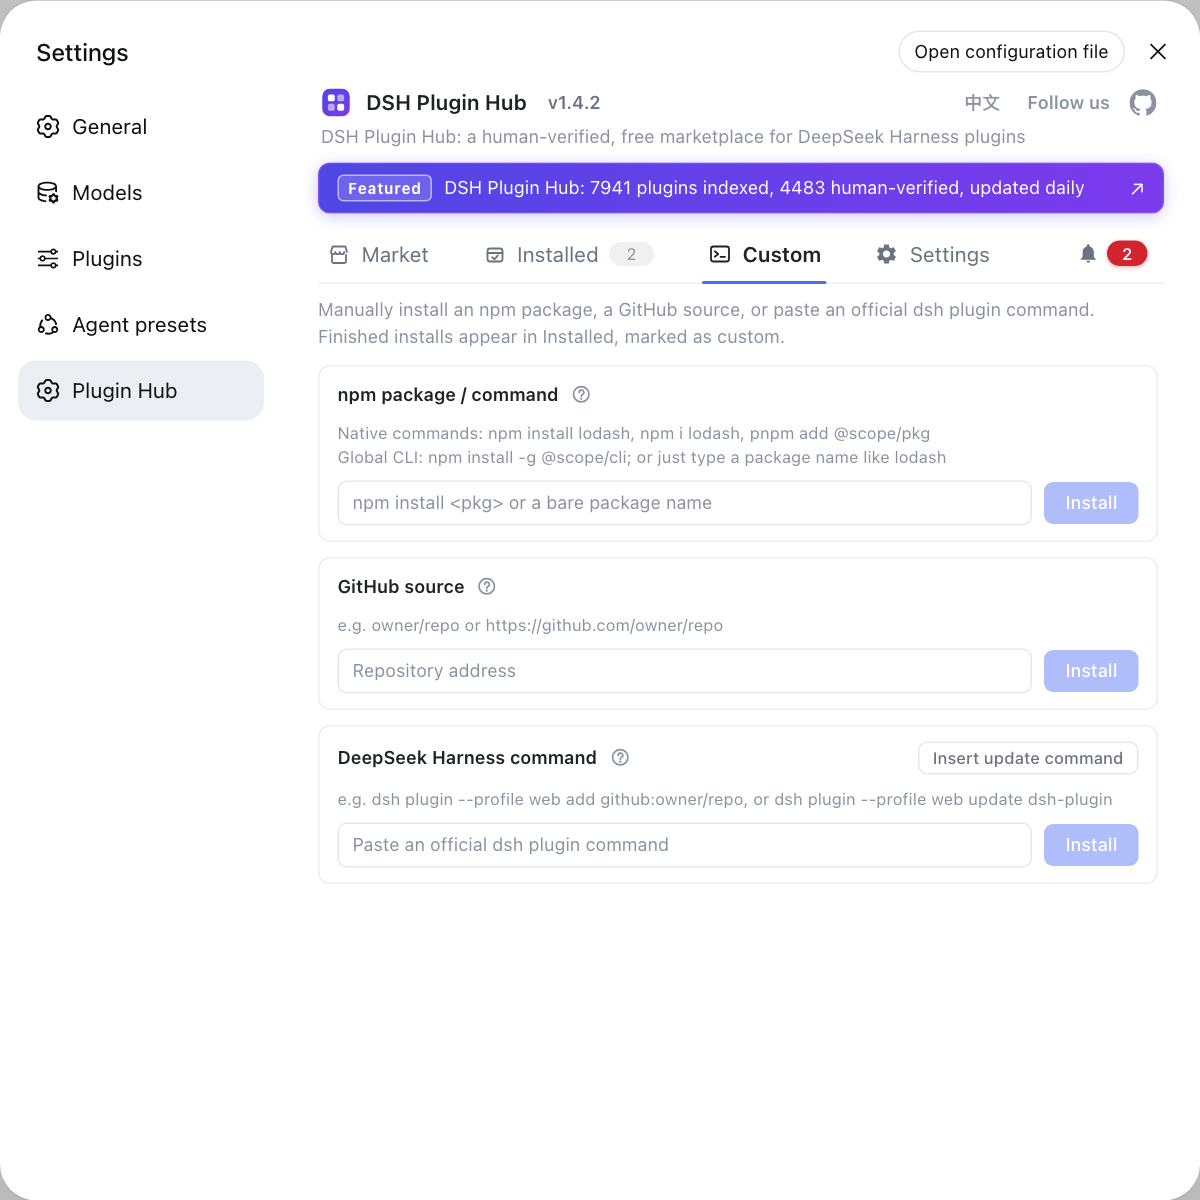
- Or use the graphical route. A local directory or source checkout can also be installed into the current profile from the plugin market's custom install. Expected: no hand-typed commands, and the entry shows up in the installed list.
The full local-directory walkthrough is in installing from a local directory, and the end-to-end development and packaging flow is in how to develop a DSH plugin.
Debugging a DSH plugin: --dump-config, logs, and load failures
When a plugin has no effect, split the question in two: did it reach the configuration tree at all, and did apply throw (source).
- Dry-run the configuration first. Use
--dump-default-configor--dump-configto print the composed configuration tree without starting. Expected: your plugin appears in the tree, so the load path is right; if it does not, fix the patch or dependency declaration before touching code. - Then read startup output. The host prints plugin load information as it starts. Expected: you can tell "never loaded" apart from "loaded and failed".
- Treat load failures as apply exceptions. An exception thrown by
applyleaves the plugin failed. Expected: read the stack trace, find the line, and stop restarting blindly. - Filter the system log by category and level. Expected: you can see whether the failure is at load time or run time instead of a vague "nothing happened".
- Confirm the profile. A plugin installed into one profile only takes effect there. Expected: starting another profile without the plugin is exactly why something looks installed yet inert.
How to stand up a debugging environment and run from source is in building and debugging from source.
Caveats and limits of building your first DSH plugin
applyis the one hard requirement. A module without it is not loaded as a plugin;nameidentifies the plugin, so do not omit either.- Local file insertion needs absolute paths. A patch overlay contributes configuration only and does not change module resolution, so relative paths fail to resolve.
- Declare dependencies instead of assuming them. List services such as
toolsandllmininjectso the framework sequences loading rather than you waiting insideapply. - Mind the cleanup boundary. Resources registered through
ctxare revoked automatically, while your own resources need actx.effect()disposer or hot reloads leave residue. - Interfaces will change during the developer preview. The official docs state that breaking changes are coming, so keep plugin code adjustable rather than tied to one version's internal behaviour.
Once the local loop works, publishing comes next: add the official dsh-plugin topic to your repository and follow the plugin market submission process, as described in how to publish to the plugin market. For reference implementations while developing, browse DSH Plugin Hub by category.
Sources: DeepSeek Harness development guide - your first plugin, DeepSeek Harness development guide - plugin configuration, dsh CLI README (official repository)
FAQ
A minimal DSH plugin is just a TypeScript module that exports an apply function, plus a name identifying it and an optional inject list for services it needs. The official tutorial creates one directory with one .ts file and no project scaffold, then loads it into the Web UI with a patch overlay.
A DeepSeek Harness plugin exports a Config describing the shape and receives the configuration object as the second argument of apply, which the framework validates and passes in. The pattern is export const Config: Schema<Config> = Schema.object({...}) together with export function apply(ctx: Context, config: Config).
Yes, a DSH plugin can be installed without publishing. There are two routes: insert the local file into the running configuration tree with a patch overlay, which suits single-file checks, or install the local package directory with dsh plugin --profile web add <local path>, which forwards to pnpm and therefore accepts local paths.
A DSH plugin that fails to load or seems to have no effect needs two layers checked: use dsh --dump-config to confirm the plugin actually reaches the composed configuration tree, then read the host's terminal output and system logs for load errors. An exception thrown by apply leaves the plugin failed, so fix the code from the stack trace rather than restarting repeatedly.
Publishing a DSH plugin comes after the local loop works: package the plugin as its own npm package or public repository, add the official dsh-plugin topic so it can be discovered, and then follow the plugin market submission process. Publishing and local debugging are separate workflows, so see the site's publishing guide.
Related Terms
- apply function
- The apply function is the entry point of a DSH plugin: the framework calls it on load and passes a `ctx` context object through which the plugin registers event listeners, tools, and services. It is the defining mark of a plugin, since a module without apply is not loaded as one.— DeepSeek Harness development guide - your first plugin
- inject declaration
- An inject declaration is the string array with which a plugin states which services it needs, such as tools or llm. Once declared, the framework waits for those services before calling apply, unloads the plugin when they disappear, and reloads it when they return, so the plugin never handles dependency timing itself.— DeepSeek Harness development guide - your first plugin
- patch overlay
- A patch overlay is a YAML file that contributes configuration only and can be passed to dsh with `--patch`, used to insert a local plugin file into the running configuration tree. It does not change the profile directory the loader uses to resolve module paths, so paths to local files must be absolute.— DeepSeek Harness development guide - your first plugin
- --dump-config
- --dump-config is the DeepSeek Harness argument that prints the composed configuration tree without starting the app, used to confirm whether a local plugin really loaded. When debugging a plugin it answers before the logs do: if the tree lacks the plugin, the problem is not in your plugin code.— dsh CLI README
Sources
- DeepSeek Harness development guide - your first plugin· deepseek-ai
- DeepSeek Harness development guide - plugin configuration· deepseek-ai
- dsh CLI README· deepseek-ai