Install DSH plugins from a local directory or GitHub source
Installing from a local directory with dsh plugin add is one command: after git cloning the plugin repo, run dsh plugin --profile web add ./the-directory from the directory that contains it and pnpm links it into the profile. The GitHub source form (github:owner/repo) fetches source, not built artifacts - the author must ship a prepare build script and you must add the package to allowBuilds (pnpm 10+ refuses by default). For the least friction, use the npm build or the DSH Plugin Hub plugin market. This guide walks through all three options per the official docs.
Overview
In one sentence: local directory install is the most direct way to debug a plugin - dsh plugin add forwards to pnpm, so anything pnpm supports works through dsh. The official tutorial "Package and install a plugin" walks through the bundle concept, add ./hello-plugin for a local checkout, github:you/hello-plugin for source installs, and the build-script catch (source). The three options are covered below.
Install a local directory: git clone, then add
A local directory install links the plugin source directory straight into the profile - edits apply after a restart, making it ideal for debugging. The full flow from the official tutorial:
- Prepare a plugin package directory that contains at least a
package.json(declaredsh.bundleto get a config layer) and the plugin entry file. To debug an existing repo, clone it first:bashgit clone https://github.com/you/plugin-repo.git cd plugin-repo - Run add from the directory that contains the plugin package, pointing the argument at the directory:
The official example isbash
dsh plugin --profile web add ./the-directorydsh plugin --profile demo add ./hello-plugin(source). The first run initializes the profile, pnpm links the checkout as alink:dependency, anddshappends the package todsh.profile.bundleswhen it declaresdsh.bundle. - Verify the layer without booting:
You should see abash
dsh --profile web --dump-config# == plugin-namelayer in the output. - Boot to confirm the plugin loads:
bash
dsh --profile web - Edit the source in the directory, restart the Web UI, and the new behavior takes effect.
Note: dsh.profile is created and maintained by dsh plugin - the official docs say never write it by hand (source).
GitHub source install: the missing-build-artifact catch, prepare and allowBuilds
github:owner/repo installs source, not built artifacts - a TypeScript package arrives without its lib/ output and fails to load, which is the biggest trap of GitHub source installs. Fixing it takes one action on each side (source):
- Author side: ship a
preparescript. pnpm runs it after a git install to build the published entry points from source, and it must be self-contained (no assumptions about dev-only context such as a sibling monorepo checkout). The official example turtle-ui uses a dedicated tsdown config that transpilessrc/without project references or type checking. - User side: allowlist the build. pnpm 10 and later refuse to run a git dependency's
preparescript by default, so the firstaddfails -dshpoints at the fix: copy the package key pnpm printed into the profile'spnpm-workspace.yaml:Then re-run theyamlallowBuilds: the-plugin-package: trueadd.
Treat allowBuilds as what it is: permission to execute that package's code on your machine at install time (outside any sandbox). Only allow sources you trust, and pin a commit (github:owner/repo#sha) so a later push cannot silently change what runs (source).
Choosing between npm builds, the market and source installs
If you would rather not ask users for the build allowance, distribute built artifacts instead - neither the npm form nor a tarball needs any build permission. Three suggestions:
- Debugging or modifying source -> a local directory
add ./diris fastest: edit, restart, done. - Installing a ready-made plugin -> prefer the npm version:
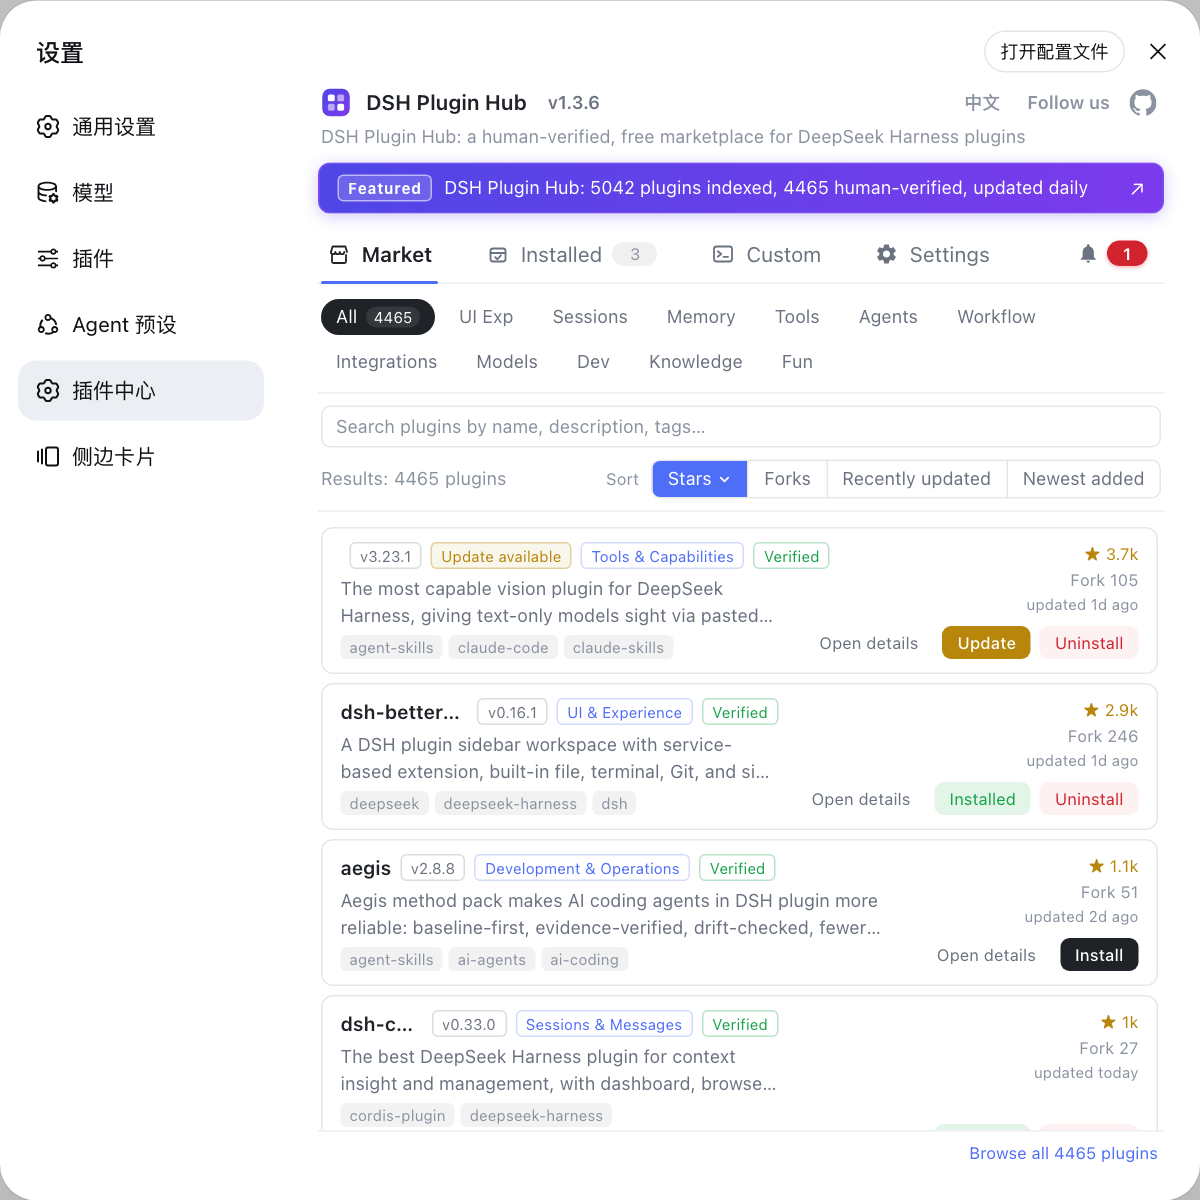
dsh plugin --profile web add <package>works becauselib/was built atpnpm publishtime; or take a tarball frompnpm packand rundsh plugin add ./plugin-0.1.0.tgz(source). - Visual install and updates -> open Settings -> Plugin Market in the Web UI, the community market DSH Plugin Hub: browse by category and install, upgrade or uninstall with one click - more convenient than the command line.
Notes
dsh pluginforwards its arguments to pnpm, soadd ./dir,add <package>,add github:owner/repoandadd ./package.tgzall go through the same channel (source).- A GitHub source install fetches source; without a
preparescript the package arrives missing its build output and fails to load - check whether the author distributes built artifacts first. - pnpm 10+ refuses git dependency build scripts by default; confirm the source is trustworthy before allowlisting in
allowBuilds. - When possible, pin a commit (
github:owner/repo#sha) to make the install reproducible. - A package without a
dsh.bundledeclaration installs but activates no layer -dsh pluginprints a warning (source). - Once local debugging is done, submit the plugin to DSH Plugin Hub so more people can install it directly.
Sources: Package and install a plugin (official docs), turtle-ui (prepare script example)
FAQ
Yes. The dsh plugin subcommand forwards its arguments to pnpm, which natively supports installing a local directory: after git cloning the plugin repo, run dsh plugin --profile web add ./the-directory from the directory that contains it (the official tutorial uses add ./hello-plugin). pnpm links the checkout into the profile, and packages that declare dsh.bundle are appended to the bundles list automatically.
Two steps: run dsh --profile web --dump-config and look for the '# == plugin-name' layer to confirm the config layer is active, then boot with dsh --profile web and check the log for a plugin-loaded message. You can also confirm it appears in the installed list under Settings -> Plugin Market.
A git install fetches source, not built artifacts, and the source package's prepare build script does not run by default. pnpm 10 and later refuse to run a git dependency's prepare script, so the first add fails. Copy the package key pnpm prints into the allowBuilds section of the profile's pnpm-workspace.yaml, then re-run the add.
Treat it as what it is: permission to execute that package's code on your machine at install time, outside any sandbox. Only allow sources you trust, and pin a commit (github:owner/repo#sha) so a later push cannot silently change what runs. The official docs call it out explicitly.
To debug or modify source, local directory add ./dir is fastest. To install a repo that ships no built artifacts, use the GitHub source with prepare + allowBuilds. For the least friction pick the npm version (lib/ is built at pnpm publish time, so add <package> just works), or install and update visually through the DSH Plugin Hub plugin market.